Celtic Knotwork Tutorial: A Comprehensive Guide
Embark on a fascinating journey into the world of Celtic art! This tutorial provides a detailed exploration of creating intricate knots, beginning with foundational techniques and progressing to advanced designs.
Learn to master the art of interweaving lines, utilizing a circular approach with evenly spaced tic marks for precision, ensuring comfortable working space for beginners and seasoned artists alike.
Welcome to the captivating realm of Celtic knotwork! These intricate designs, steeped in history and symbolism, represent eternity, interconnectedness, and the cyclical nature of life. This tutorial serves as a comprehensive guide, demystifying the process of creating these beautiful and complex patterns.
Celtic knots aren’t merely decorative; they are visual representations of profound spiritual beliefs. The continuous lines, devoid of beginning or end, symbolize the eternal flow of existence. Understanding this underlying philosophy enhances the artistic experience.
We will begin by establishing a solid foundation, focusing on core principles like interweaving strands and maintaining continuous lines. Practical exercises will guide you through creating basic knot structures, such as simple, three-strand, and four-strand knots.
This journey will empower you to confidently tackle more advanced techniques, ultimately allowing you to design and execute your own unique Celtic knotwork masterpieces. Prepare to explore a rich artistic tradition!
II. Historical Background of Celtic Knots
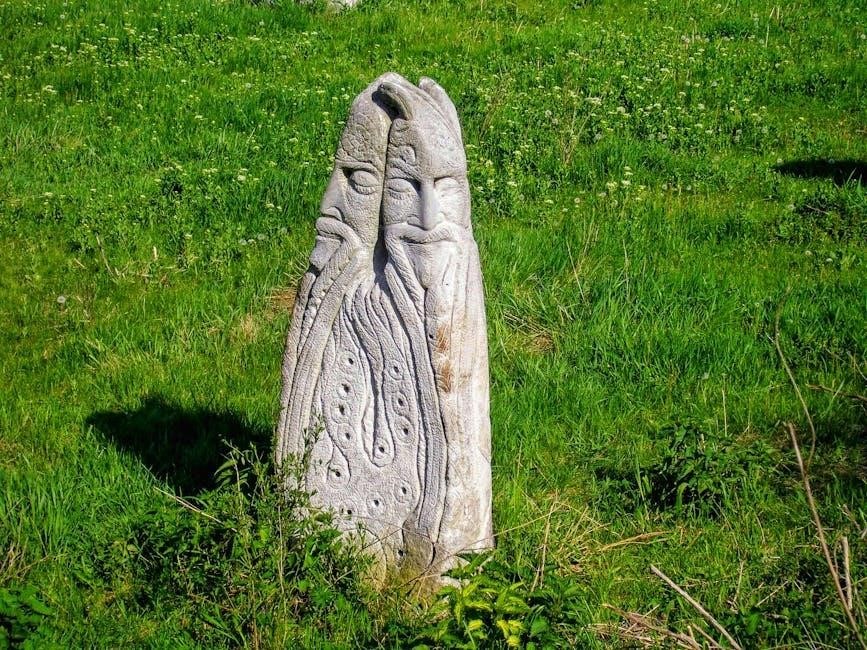
The origins of Celtic knotwork are deeply rooted in the artistic traditions of the Celts, flourishing from around 600 AD, though influences predate this period. Initially appearing in illuminated manuscripts like the Book of Kells, these intricate designs weren’t solely confined to paper.
Evidence suggests knotwork adorned metalwork, stone carvings, and everyday objects throughout Celtic lands – Ireland, Scotland, Wales, Cornwall, and Brittany. Roman influences, combined with pre-existing Celtic artistic motifs, likely contributed to their development.
Interestingly, the knots weren’t simply aesthetic choices. They carried symbolic weight, representing concepts like eternity, faith, and the interconnectedness of all things; The lack of clear beginnings or ends reinforced this idea of endless continuity.
Over time, Celtic knotwork evolved, becoming increasingly complex and refined. Its resurgence in popularity during the Celtic Revival of the 19th century cemented its place as a powerful symbol of Celtic identity and artistry.
III. Core Principles of Celtic Knot Design
At the heart of Celtic knotwork lie three fundamental principles: interweaving strands, continuous lines, and symmetry/balance. Understanding these is crucial for successful knot creation.
Interweaving is paramount. Strands must seamlessly pass over and under each other, creating a visually dynamic and flowing pattern. This isn’t merely about crossing lines; it’s about a deliberate, rhythmic interaction.
Continuous lines are essential. A true Celtic knot has no breaks or endpoints. The line travels endlessly, symbolizing eternity and interconnectedness. This requires careful planning and execution.
Symmetry and balance contribute to visual harmony. While not always perfectly symmetrical, a well-designed knot exhibits a sense of equilibrium. This can be achieved through mirroring elements or a balanced distribution of complexity.
Mastering these principles allows for the creation of visually compelling and authentic Celtic knot designs, forming the foundation for more intricate patterns.
III.A. Interweaving Strands
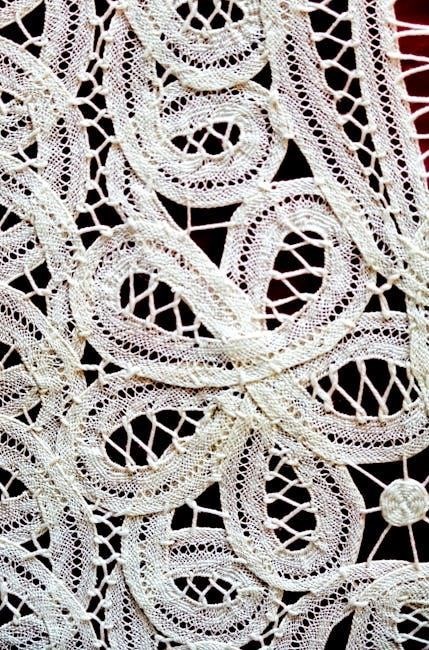
The core of Celtic knotwork’s visual appeal lies in the artful interweaving of strands. This isn’t simply about lines crossing; it’s a deliberate dance of ‘over’ and ‘under’ creating a sense of continuous flow and connection.
Visualize each strand as a ribbon gracefully looping and twisting around its neighbors. The key is to maintain consistent thickness and spacing throughout the design. Carefully observe how strands pass above one, then below the next, establishing the rhythmic pattern.
Practice is vital. Begin with simple two-strand weaves, focusing on clean, precise crossings. Gradually increase complexity, adding more strands and intricate pathways;
Remember to avoid sharp angles; curves contribute to the organic, flowing aesthetic. Successful interweaving creates a mesmerizing illusion of depth and movement, defining the essence of Celtic knotwork.
Consistent practice will yield beautiful results!
III.B. Continuous Lines & No Endings
A defining characteristic of authentic Celtic knots is the absence of breaks or endings in the lines. These designs symbolize eternity, interconnectedness, and the cyclical nature of life – a continuous, unbroken journey;
This principle demands careful planning and execution. Each strand must seamlessly connect back into itself, forming an endless loop. Avoid creating isolated segments or lines that abruptly terminate.
Visualize the design as a single, flowing ribbon twisting and turning upon itself. Tracing any strand should lead you back to its starting point without interruption.
Achieving this continuity often requires strategic overlapping and underlapping of strands. It’s a puzzle-like process, demanding patience and a keen eye for detail. Embrace the challenge, and the reward is a visually harmonious and symbolically resonant knot.
Perseverance is key to mastering this technique!
III.C. Symmetry and Balance
While not strictly mandatory, symmetry and balance are frequently observed in traditional Celtic knotwork, contributing to their aesthetic appeal and visual harmony. This doesn’t always mean perfect mirroring, but rather a sense of equilibrium within the design.
Consider the weight and distribution of lines and shapes. A balanced knot feels stable and pleasing to the eye, avoiding a lopsided or chaotic appearance.
Radial symmetry, where elements radiate from a central point, is common. However, asymmetrical designs can also be effective, provided they maintain a sense of visual balance through careful arrangement of elements.
Experiment with different arrangements and observe how they affect the overall composition. Subtle adjustments can significantly impact the knot’s perceived balance.
Strive for a design where no single area dominates, creating a cohesive and visually satisfying artwork.
IV. Essential Tools and Materials
To begin your Celtic knotwork journey, a modest collection of tools is all you require; For initial practice and sketching, simple paper and pencils are invaluable – allowing for quick iterations and exploration of designs without commitment.
As you refine your work, pens and inking tools become essential. Fineliner pens in varying widths offer precision and control, while calligraphy pens can add expressive line weight. Consider waterproof ink to prevent smudging.
For those inclined towards digital art, software options abound. Programs like Adobe Illustrator or Procreate provide versatility and the ability to easily edit and color your knots.
A ruler or straight edge can be helpful for establishing guidelines, and an eraser is a must-have for correcting mistakes.
Ultimately, the best tools are those you feel most comfortable with, allowing your creativity to flow freely.
IV.A. Paper and Pencils (For Practice)
Paper and pencils form the cornerstone of learning Celtic knotwork, providing an accessible and forgiving medium for beginners. Don’t feel pressured to invest in expensive materials initially; standard printer paper is perfectly adequate for practice.
A variety of pencil grades is beneficial. Softer pencils (like 2B or 4B) create darker lines, ideal for sketching initial designs, while harder pencils (HB or 2H) are better suited for precise guidelines and lighter construction lines.
Embrace the iterative process! Celtic knotwork often involves trial and error. Paper allows you to freely experiment with different patterns and variations without the permanence of ink.
Focus on establishing a comfortable working space and making frequent, small tic marks to guide your curves, as recommended for circular designs.
Don’t be afraid to fill pages with practice knots – repetition is key to mastering the fundamental over-under weaving techniques.
IV.B. Pens and Inking Tools
Once comfortable with pencil sketches, transitioning to pens and inks elevates your Celtic knotwork. This stage introduces permanence and allows for bolder, more defined lines.
Fineliner pens are an excellent starting point, offering control and precision for intricate details. Various tip sizes are useful – finer tips for delicate strands, broader tips for emphasizing key areas.
Dip pens and ink provide a traditional feel and allow for expressive line variation, but require practice to master. India ink is a popular choice due to its rich black color and waterproof qualities.
Consider brush pens for dynamic lines and shading effects. Experiment with different pressures to create varying line weights, adding depth and visual interest.
Remember to test your pens on scrap paper before applying them to your final design, ensuring consistent ink flow and desired line thickness.
IV.C. Digital Design Software (Optional)
For those seeking a modern approach, digital design software offers powerful tools for Celtic knotwork creation. While not essential, it unlocks possibilities for precision, experimentation, and easy modification.
Vector-based programs like Adobe Illustrator or Inkscape are ideal, allowing you to scale designs without loss of quality. These programs excel at creating clean, crisp lines crucial for knotwork.
Raster-based software like Photoshop can also be used, particularly for adding textures, shading, and coloring. However, be mindful of resolution to maintain detail.
Digital tablets with stylus pens mimic the feel of traditional drawing, providing greater control and a more natural workflow. Explore various brush settings for diverse line styles.
Numerous online tutorials and resources are available to guide you through digital knotwork techniques, accelerating your learning curve and expanding your creative horizons.
V. Basic Knot Structures: The Foundation
Before diving into complex designs, mastering fundamental knot structures is paramount. These building blocks form the basis for nearly all Celtic knotwork, providing a solid understanding of interweaving principles.
The simple over-under pattern is the most basic element, demonstrating how strands pass above and below each other. Practice this repeatedly to internalize the core concept of knot formation.
Progressing to the three-strand knot introduces a slightly more complex weave, requiring careful attention to line direction and overlapping sequences. This builds spatial reasoning skills.
The four-strand knot further challenges your understanding, demanding precise execution to avoid tangled or broken lines. It’s a crucial step towards more intricate patterns.
Consistent practice with these foundational structures is key. Experiment with variations in strand thickness and spacing to develop your unique style and artistic voice;
V.A. The Simple Knot (Over-Under Pattern)
The cornerstone of Celtic knotwork lies in the deceptively simple over-under pattern. This foundational technique establishes the core principle of interweaving, where lines seamlessly pass above and below one another, creating the illusion of a continuous strand.
Begin by drawing two parallel lines. Visualize one strand traveling over the first line and then under the second. Conversely, the second strand goes under the first and over the second.

Focus on maintaining consistent spacing and curvature. Smooth, flowing lines are essential for achieving the characteristic elegance of Celtic knots. Practice creating multiple repetitions of this pattern.
Experiment with varying the thickness of the lines to add visual interest. This simple exercise builds muscle memory and a fundamental understanding of knot construction.
Mastering this basic pattern is crucial before progressing to more complex structures, as it forms the basis for nearly all Celtic knot designs.
V.B. The Three-Strand Knot
Building upon the simple over-under pattern, the three-strand knot introduces a new layer of complexity and visual appeal. This knot requires careful attention to the weaving sequence to maintain continuity and avoid breaks in the lines.
Start with three parallel lines, evenly spaced. Imagine the first strand traveling over the middle line, then under the third. The second strand goes under the first, over the middle, and then under the third. Finally, the third strand goes over the first and middle lines.
Maintaining consistent curves and spacing is paramount. Ensure each strand gracefully weaves around the others, creating a harmonious flow. Practice visualizing the path of each strand before committing to ink.
This knot demonstrates the core principle of continuous lines, a hallmark of Celtic knotwork. It’s a stepping stone towards more intricate designs and a deeper understanding of knot construction.
Regular practice will solidify your understanding and allow you to confidently tackle more challenging knot structures.
V.C. The Four-Strand Knot
The four-strand knot represents a significant leap in complexity from the three-strand version, demanding increased precision and spatial reasoning. It’s a fantastic exercise in understanding how multiple strands interact within a Celtic knot structure.
Begin by establishing four parallel lines, maintaining consistent spacing. Visualize the weaving pattern: the first strand travels over two, then under one. The second goes under one, over two, and so on, rotating the pattern for each strand.
Carefully monitor the intersections to ensure clean, unambiguous crossings. Avoid creating tangled or overlapping lines, as this will disrupt the knot’s visual flow and integrity.
This knot beautifully illustrates the principle of continuous lines, where each strand seamlessly integrates with the others, forming a cohesive and unbroken design.
Consistent practice is key to mastering this knot, building muscle memory and refining your ability to visualize complex weaving patterns.
VI. Step-by-Step: Drawing a Basic Celtic Knot
Let’s translate theory into practice! This section guides you through creating a fundamental Celtic knot, building from simple shapes to an interwoven masterpiece. Begin by establishing a precise grid using light pencil guidelines – horizontal and vertical lines are essential for maintaining symmetry.
Next, mark evenly spaced points along these lines; these will serve as anchor points for your knot’s curves. Remember the “over-under” pattern – alternate which strand passes over and under at each intersection.
Draw gentle curves connecting these points, ensuring they flow smoothly and consistently. Focus on maintaining equal spacing between the curves to achieve visual balance.
Once the initial pattern is complete, refine the lines, thickening them and adding depth through subtle shading. Erase any remaining grid lines for a clean, polished look.
Practice makes perfect! Don’t be discouraged by initial attempts; each knot drawn strengthens your understanding of the underlying principles.
VI.A. Establishing the Grid and Guidelines
Precision is paramount when embarking on Celtic knotwork! Before a single curve is drawn, a foundational grid must be established. Begin with a light, even application of pencil to create a network of horizontal and vertical guidelines across your chosen surface.
These lines act as the skeleton of your design, ensuring symmetry and proportional accuracy. Consider the desired size and complexity of your knot when determining the grid’s spacing – smaller spaces yield more intricate designs.
Equally important are the anchor points; mark these at regular intervals along your guidelines.
Tic marks, as suggested by experienced artists, are incredibly useful for maintaining consistent spacing, particularly when working in a circular format.
Remember to keep your lines light! They are merely guides and will be erased later, allowing the knotwork itself to take center stage.
VI.B. Creating the Initial Over-Under Pattern
With your grid established, the core of the knot begins to emerge! This stage focuses on defining the fundamental “over-under” weave that characterizes Celtic knotwork. Starting at one of your anchor points, begin drawing a continuous line, alternating between passing over and under the grid lines.
Visualize the strands interlacing; this is crucial for achieving a believable and flowing design. Referencing the tic marks ensures consistent curves and spacing, particularly when working within a circular framework.
Maintain a gentle, flowing rhythm as you trace the pattern. Avoid sharp angles or abrupt changes in direction, as these can disrupt the visual harmony of the knot.
Focus on creating a closed loop; the line should eventually return to its starting point, completing the initial weave.
Don’t worry about perfection at this stage; this is a foundational sketch, and refinements will come later!
VI.C. Refining the Lines and Adding Depth
Now, transform your initial sketch into a polished knot! Begin by carefully reviewing the lines, smoothing out any awkward curves or inconsistencies. Aim for a fluid, organic feel, enhancing the interwoven illusion.
Gradually thicken certain strands to create a sense of depth and dimension. This can be achieved by subtly varying the line weight, making some areas appear closer and others further away.
Consider adding subtle shading to emphasize the overlapping sections of the knot. This technique further enhances the three-dimensional effect, making the design visually pop.
Erase any remaining grid lines or construction marks, leaving only the clean, refined knotwork.
Experiment with different line styles – bolder outlines, delicate details – to personalize your design and achieve the desired aesthetic.
VII. Common Celtic Knot Variations
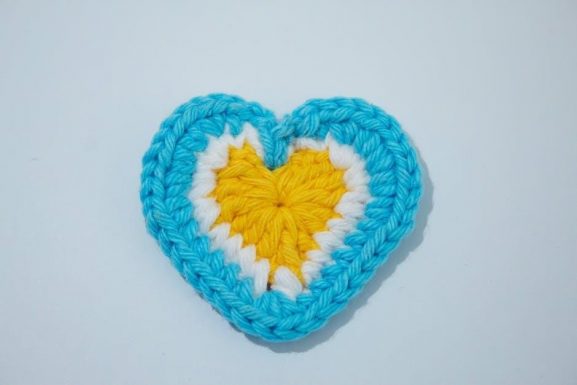
Beyond the basic structures lie iconic Celtic knot variations! The Trinity Knot (Triquetra), symbolizing the interconnectedness of mind, body, and spirit, is a classic choice, often featuring three interwoven arcs.
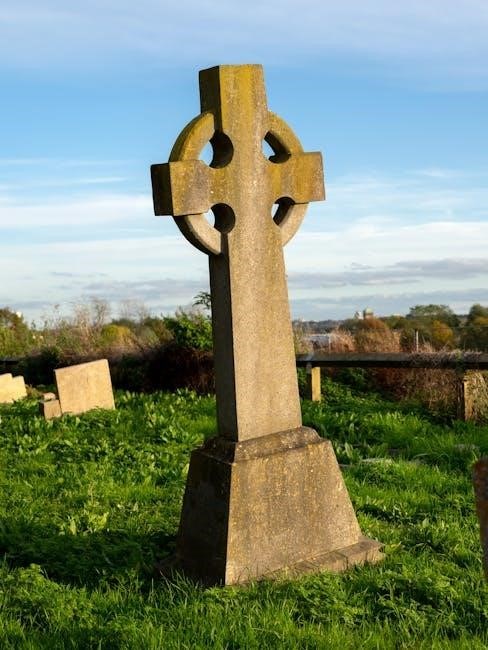
The Celtic Cross Knot blends Christian symbolism with traditional knotwork, typically incorporating a circle representing eternity and a cross at its center. It’s a powerful and visually striking design.
The Dara Knot, resembling the roots of an oak tree, embodies strength, resilience, and the enduring power of family. Its intricate, branching pattern is instantly recognizable.
These variations build upon core principles, demonstrating how simple elements can be combined to create complex and meaningful designs.
Exploring these established patterns provides a solid foundation for developing your own unique Celtic knot creations, fostering creativity and artistic expression.
VII.A. The Trinity Knot (Triquetra)
The Triquetra, or Trinity Knot, is a quintessential Celtic symbol! Representing eternity, interconnectedness, and the threefold nature of life – mind, body, and spirit – it’s a deeply meaningful design.
Construction begins with three overlapping arcs, seamlessly interwoven to create a continuous loop. Achieving this requires careful attention to the over-under pattern, ensuring smooth transitions between strands.
Traditionally, the Triquetra is drawn with flowing lines, emphasizing its continuous nature. Symmetry is key, with each arc mirroring the others to create a balanced composition.
Variations include adding embellishments, such as small spirals or additional knotwork within the arcs, to enhance its visual complexity.
Its elegant simplicity and profound symbolism make the Trinity Knot a popular choice for jewelry, tattoos, and decorative art, embodying a rich cultural heritage.
VII.B. The Celtic Cross Knot
The Celtic Cross Knot is a powerful and iconic symbol! Blending Christian and pre-Christian Celtic traditions, it represents faith, hope, and the connection between the earthly and spiritual realms. Its design is visually striking and rich in symbolism.
Construction involves a central cross shape, intricately interwoven with a circular band. The knotwork typically flows around the cross, creating a sense of unity and continuity.
Achieving a balanced design requires careful planning of the over-under pattern, ensuring that the knotwork is evenly distributed around the cross. Symmetry is crucial for visual harmony.
Variations often include embellishments, such as spirals or additional knotwork within the arms of the cross, adding layers of complexity and detail.
The Celtic Cross Knot is frequently used in jewelry, monuments, and artwork, serving as a potent reminder of faith and cultural heritage, embodying a timeless aesthetic.
VII.C. The Dara Knot (Oak Tree Knot)
The Dara Knot, also known as the Oak Tree Knot, symbolizes strength and resilience! Rooted in Celtic mythology, the oak tree represents wisdom, longevity, and a deep connection to the natural world. This knot embodies those qualities beautifully.
Its distinctive design features interwoven strands that resemble the roots of an oak tree extending downwards. The knot’s structure is often characterized by a central point from which the strands radiate outwards.
Creating the Dara Knot requires attention to detail, particularly in maintaining the smooth flow of the interwoven lines. The goal is to evoke the organic growth pattern of tree roots.
Variations can include adding leaves or other botanical elements to further emphasize the oak tree theme, enhancing the knot’s symbolic meaning and visual appeal.
The Dara Knot is a popular choice for those seeking a symbol of personal strength, endurance, and a connection to their ancestral roots, representing a powerful and grounding emblem.
VIII. Advanced Techniques & Patterns
Elevate your Celtic knotwork skills with these sophisticated techniques! Moving beyond basic structures, we explore complex designs that demand precision and a deeper understanding of interweaving principles.
Knot borders and frames offer a stunning way to contain and highlight intricate knotwork within a defined space. These frames can be simple or elaborately decorated, adding layers of visual interest.
Complex interlocking knots present a significant challenge, requiring careful planning and execution to ensure seamless connections and a harmonious flow of lines. Patience is key!
Incorporating spirals and other motifs introduces dynamic movement and symbolic depth to your designs. Spirals represent growth and expansion, while other motifs can add personal meaning.
Mastering these advanced techniques unlocks a world of creative possibilities, allowing you to craft truly unique and captivating Celtic knotwork pieces that showcase your artistic skill and vision.
VIII.A. Knot Borders and Frames
Creating knot borders and frames adds a refined elegance to Celtic designs! These structures serve not only as decorative elements but also as containers, beautifully showcasing the intricate knotwork within.
Begin by establishing a consistent width for your border, ensuring it complements the scale of the central knot. Simple, repeating knot patterns work exceptionally well for borders, providing a subtle yet effective frame.
Experiment with varying the complexity of the border knots; a more elaborate border can enhance a simpler central design, and vice versa. Consider incorporating corner elements for added visual appeal.
Pay close attention to the connections between the border and the central knotwork, ensuring a smooth and seamless transition. This integration is crucial for a polished and professional look.
Knot borders and frames are incredibly versatile, lending themselves to a wide range of applications, from illuminating manuscripts to adorning jewelry and creating stunning wall art.
VIII.B. Complex Interlocking Knots
Venturing into complex interlocking knots represents a significant step in Celtic knotwork mastery! These designs demand precision, patience, and a thorough understanding of the core principles of interweaving.
Start with a well-defined grid and guidelines, as these intricate patterns require accurate spatial planning. Building up the knot layer by layer is a recommended approach, carefully tracing each strand’s path;
Focus on maintaining continuous lines, avoiding any breaks or abrupt endings. This is paramount to achieving the characteristic flow of Celtic knots. Regularly check for intersections and ensure proper over-under relationships.
Don’t be afraid to experiment with different knot combinations and arrangements. Complex knots often involve multiple basic structures interwoven to create a unique and captivating design.
These advanced patterns are incredibly rewarding, showcasing the depth and beauty of Celtic artistry. They require dedication but yield stunning results, perfect for experienced knotwork enthusiasts.
VIII.C. Incorporating Spirals and Other Motifs
Elevate your Celtic knotwork by seamlessly integrating spirals and complementary motifs! This technique adds depth, symbolism, and a personalized touch to your designs, moving beyond traditional interweaving.
Spirals, representing growth and eternity, can be woven into the knot structure itself, or used as decorative elements surrounding it. Consider their placement carefully to maintain balance and visual harmony.
Other motifs, like stylized animals or plant life, can be incorporated, reflecting Celtic reverence for nature. These additions should complement, not overwhelm, the underlying knotwork.
Experiment with varying spiral thicknesses and densities to create visual interest. Subtle variations can dramatically alter the overall aesthetic of the design.
Remember to maintain the core principles of continuous lines and interweaving even when adding these elements. The goal is a cohesive and harmonious blend of motifs and knotwork;
IX. Coloring and Shading Celtic Knots
Bring your Celtic knotwork to life with thoughtful coloring and shading techniques! This stage transforms a linear design into a visually striking piece of art, enhancing its depth and complexity.
Consider a limited color palette to maintain elegance and avoid visual clutter. Earth tones, jewel tones, and metallic accents are popular choices, reflecting Celtic aesthetics;
Shading is crucial for creating the illusion of depth and interweaving. Use varying shades of a single color, or complementary colors, to highlight the overlapping strands.

Experiment with different shading styles – hatching, cross-hatching, and blending – to achieve desired effects. Subtle gradients can add a sophisticated touch.
Pay attention to light source and shadow placement to create a realistic and dynamic appearance. Consistent shading enhances the overall visual impact of the knotwork.

Digital tools offer a wide range of coloring and shading options, allowing for precise control and experimentation.
X. Resources for Further Learning
Continue your Celtic knotwork journey with these valuable resources! Expanding your knowledge base will unlock new techniques and inspire creative exploration.
WetCanvas offers a vibrant online community for artists, including dedicated forums for Celtic knotwork discussion and tutorials. Explore shared artwork and receive constructive feedback. (Celtic Knots 101 ― Working in a Circle ― WetCanvas: Online Living for Artists)
Numerous books delve into the history and artistry of Celtic knots, providing in-depth analysis and step-by-step instructions. Seek out titles focusing on both traditional and contemporary designs.
Online tutorials and video courses offer visual guidance and demonstrate various knotting techniques. Platforms like YouTube and Skillshare host a wealth of instructional content.
Explore Celtic art museums and historical sites to gain firsthand inspiration from authentic artifacts. Immerse yourself in the cultural context of these intricate designs.
Practice consistently and experiment fearlessly! The key to mastering Celtic knotwork lies in dedication and a willingness to explore your artistic potential.